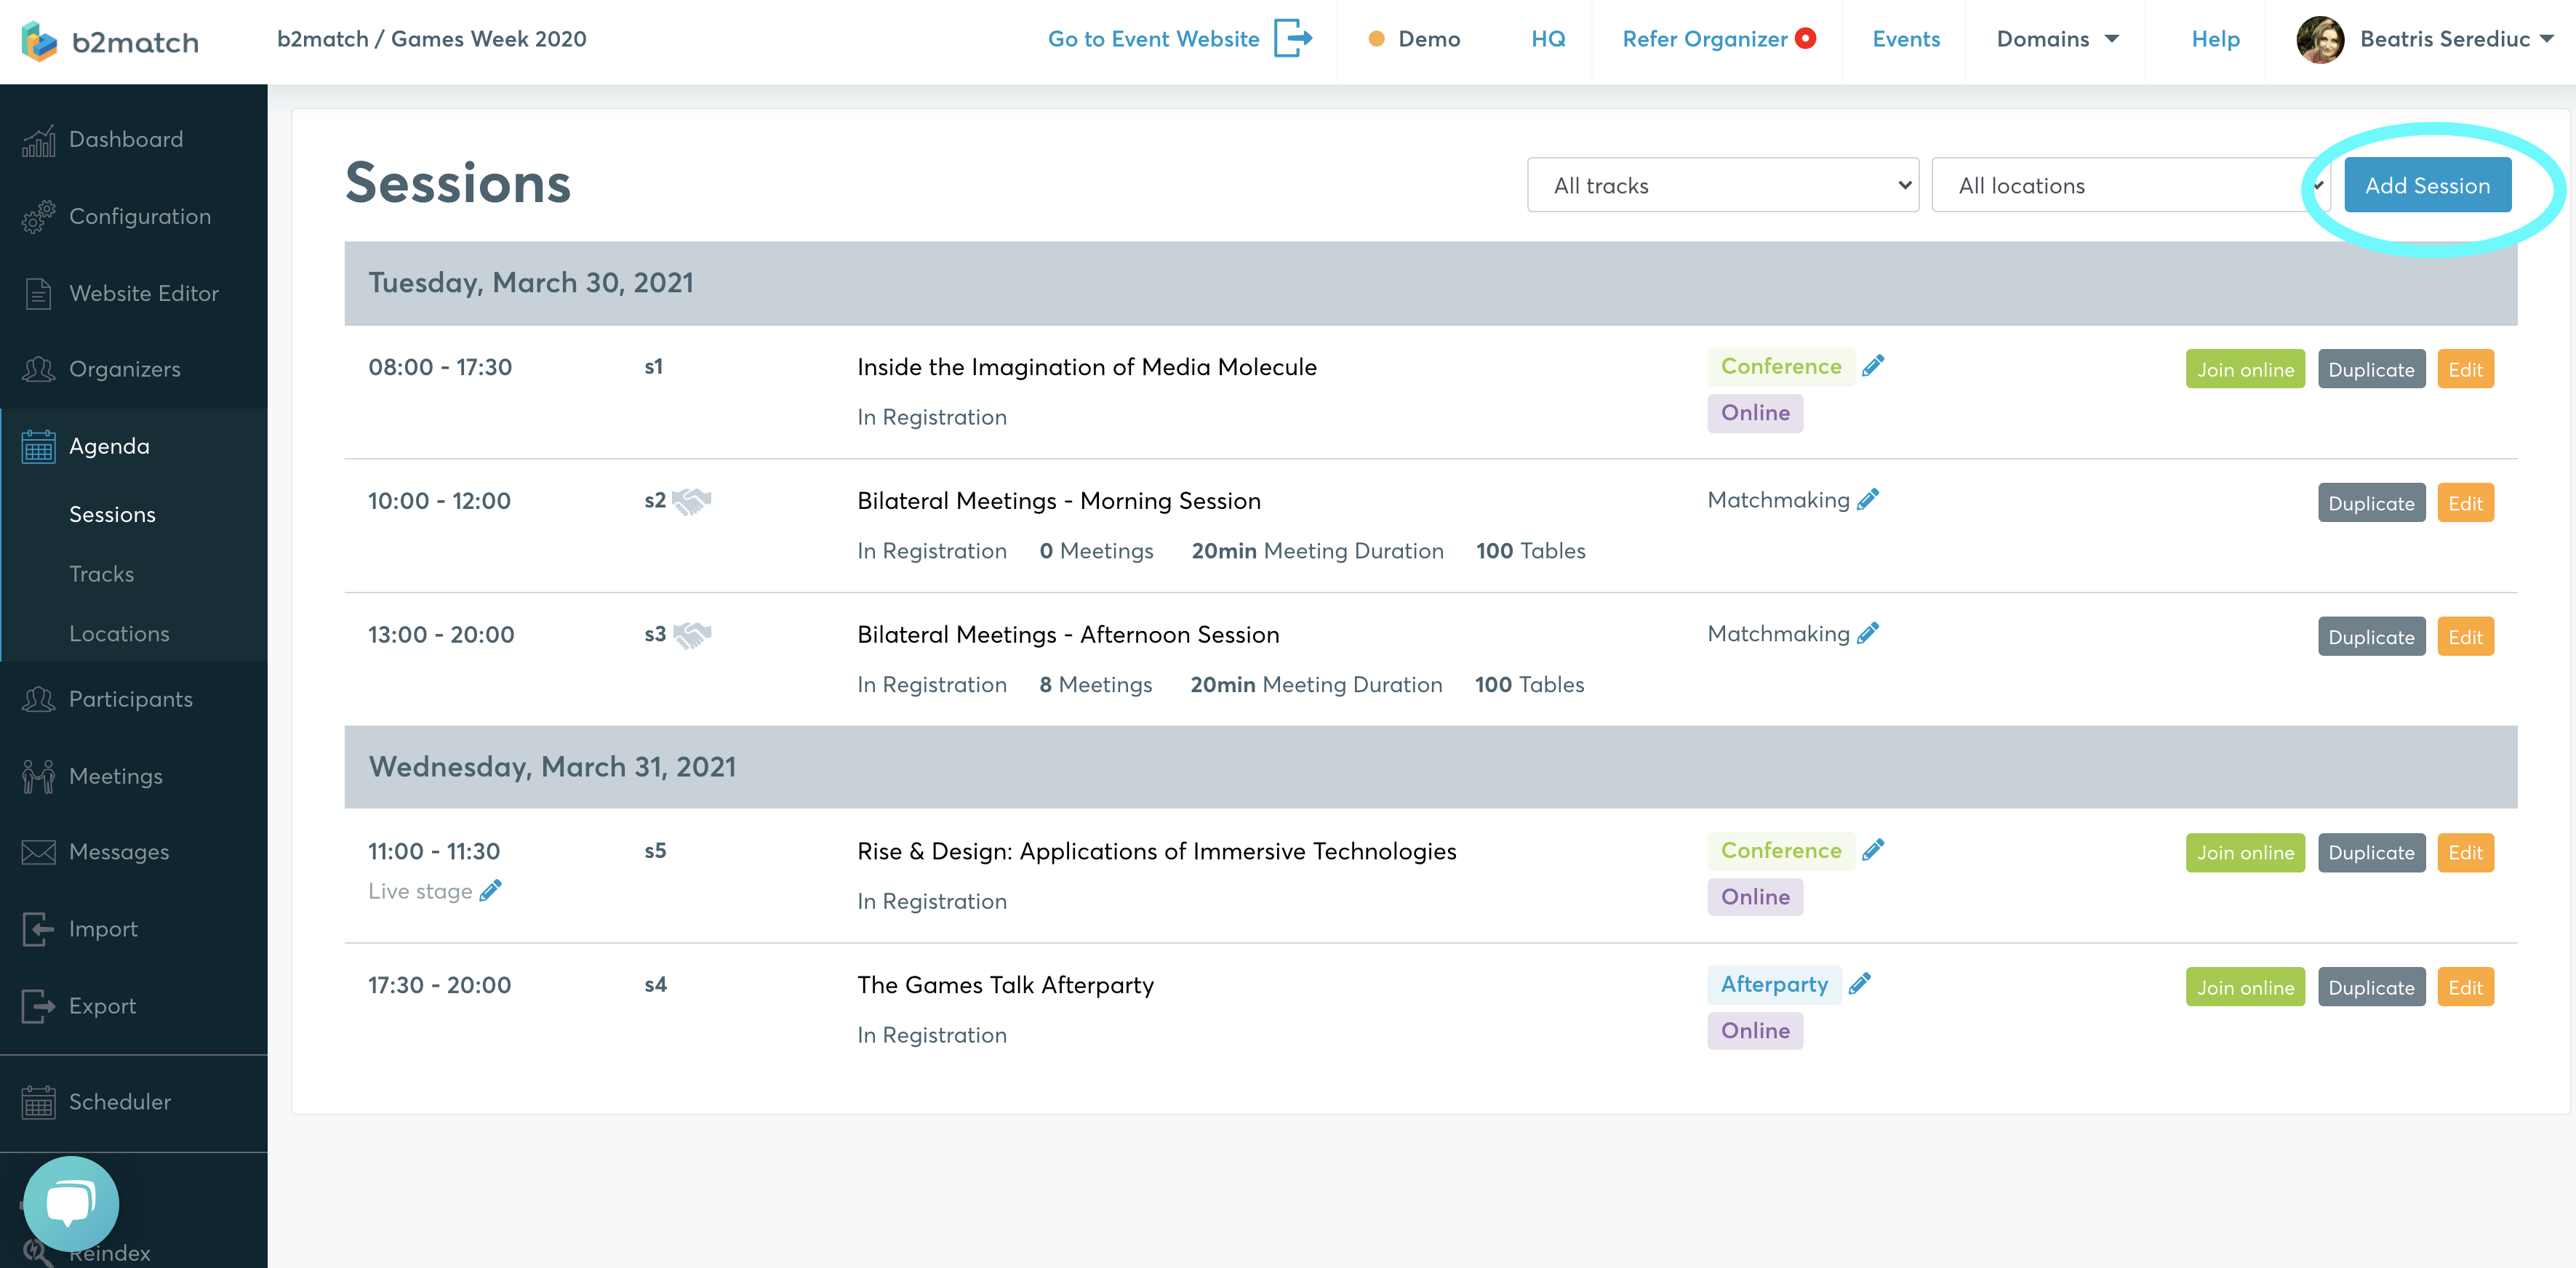
Go to Agenda and click on Add session.
Alternatively, you can duplicate an already created session and change its details.
 Add the session information and the session settings, then click on Create.
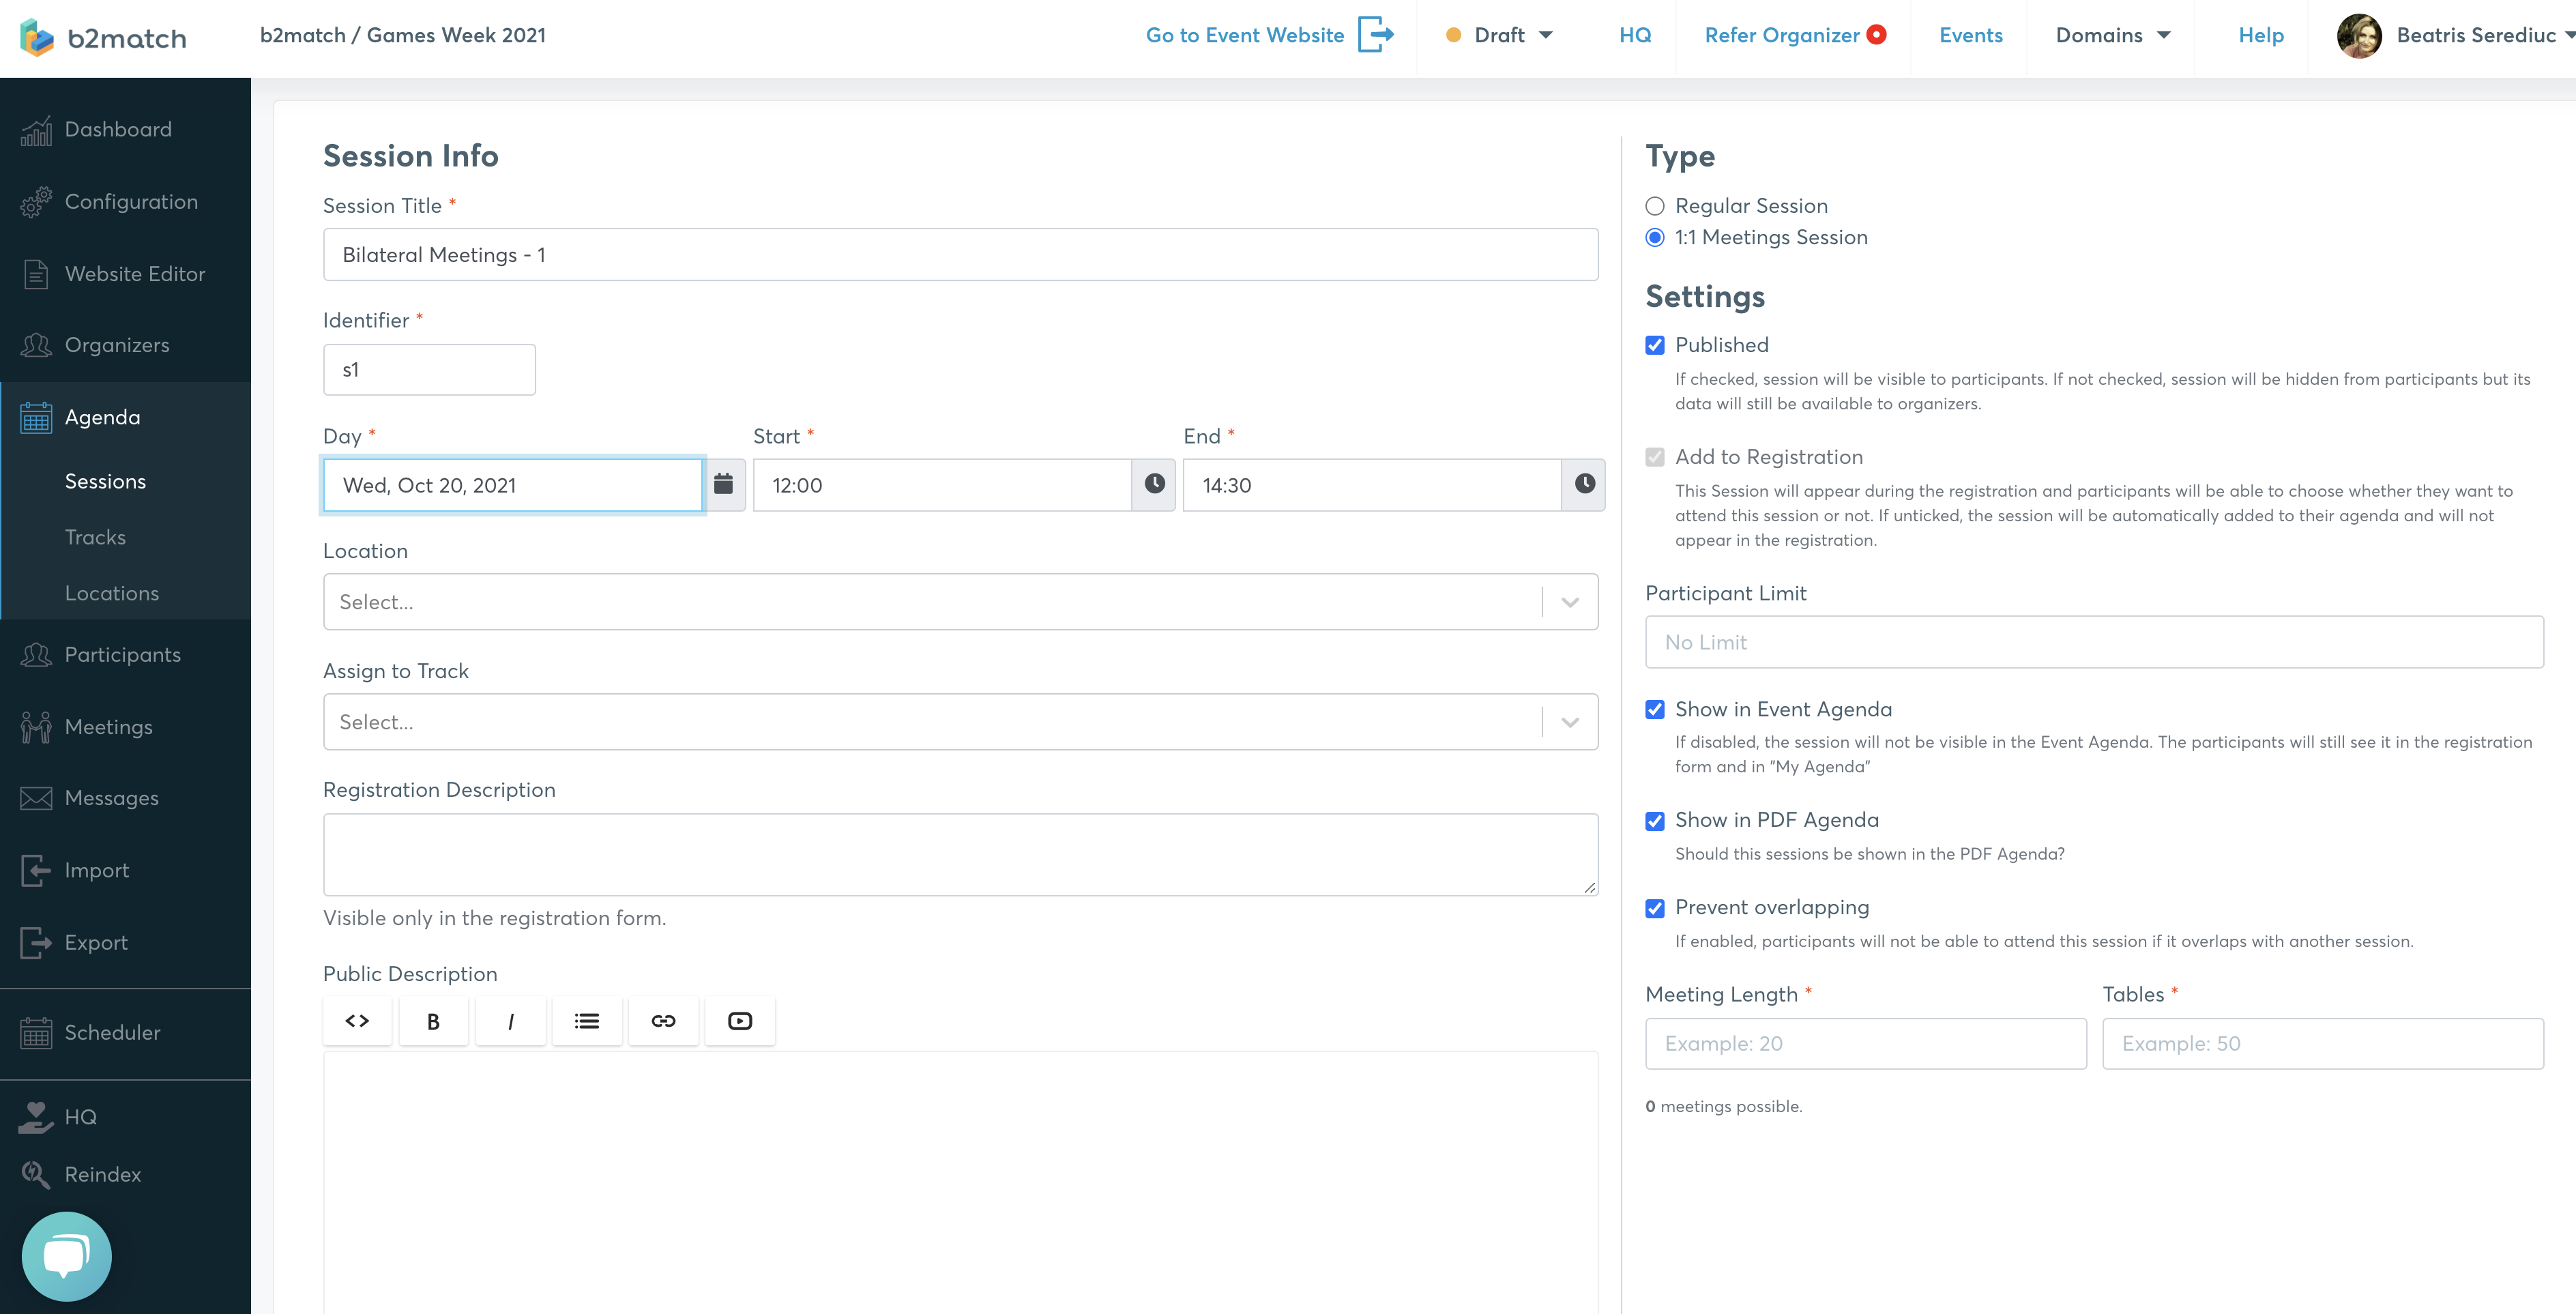
Session Info
- Session title - add a title for your session.
- Identifier - the identifier helps the system differentiate the sessions and it's merely for the organizer's use, to make it visually easier. Participants will not see it.
- Day - choose the date for your session. The date you add here will define the event date.
- Start and end - choose the time span for your session.
- Location - choose a location for your session. Keep in mind that it needs to be previously added in Locations.
- Assign to track - assign your session to a track. Keep in mind that the track needs to be previously added in Tracks.
- Registration description - add a short description for this session which will be visible in registration.
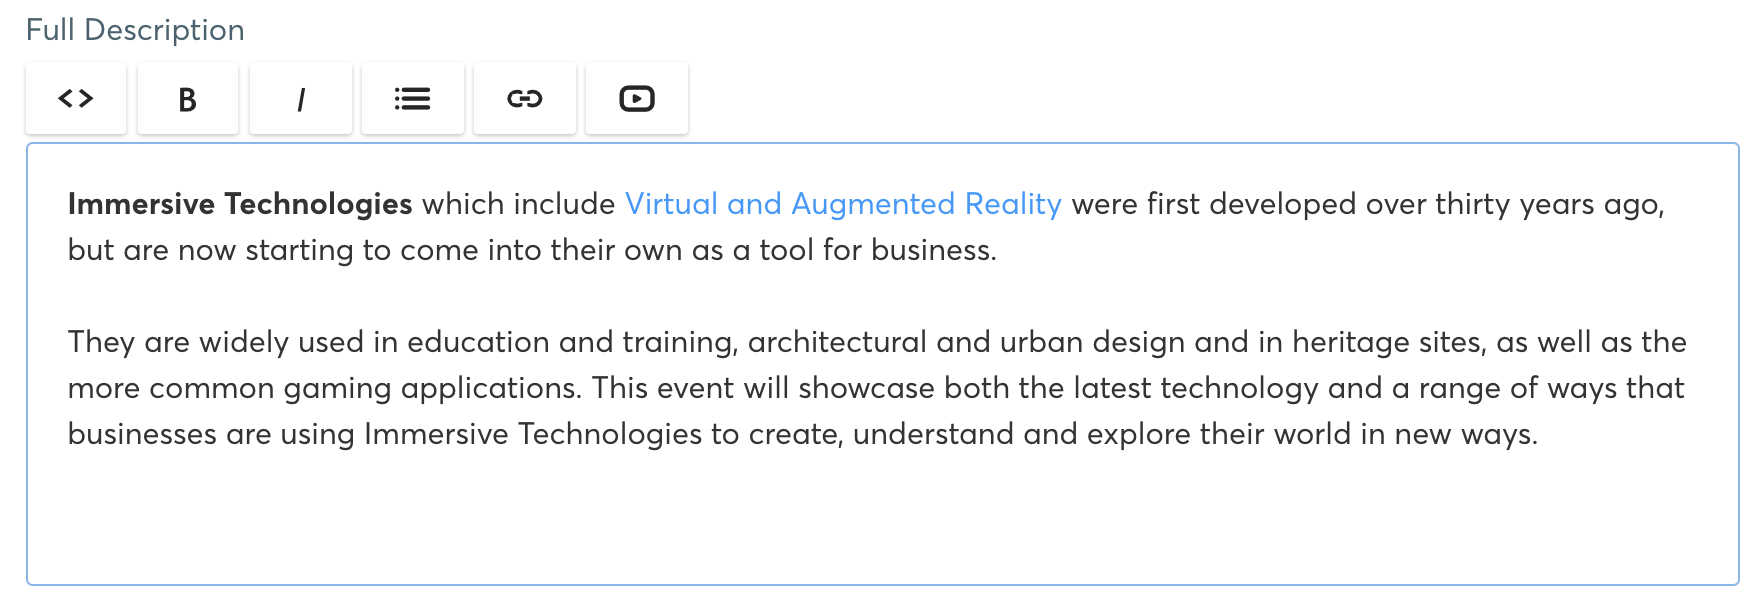
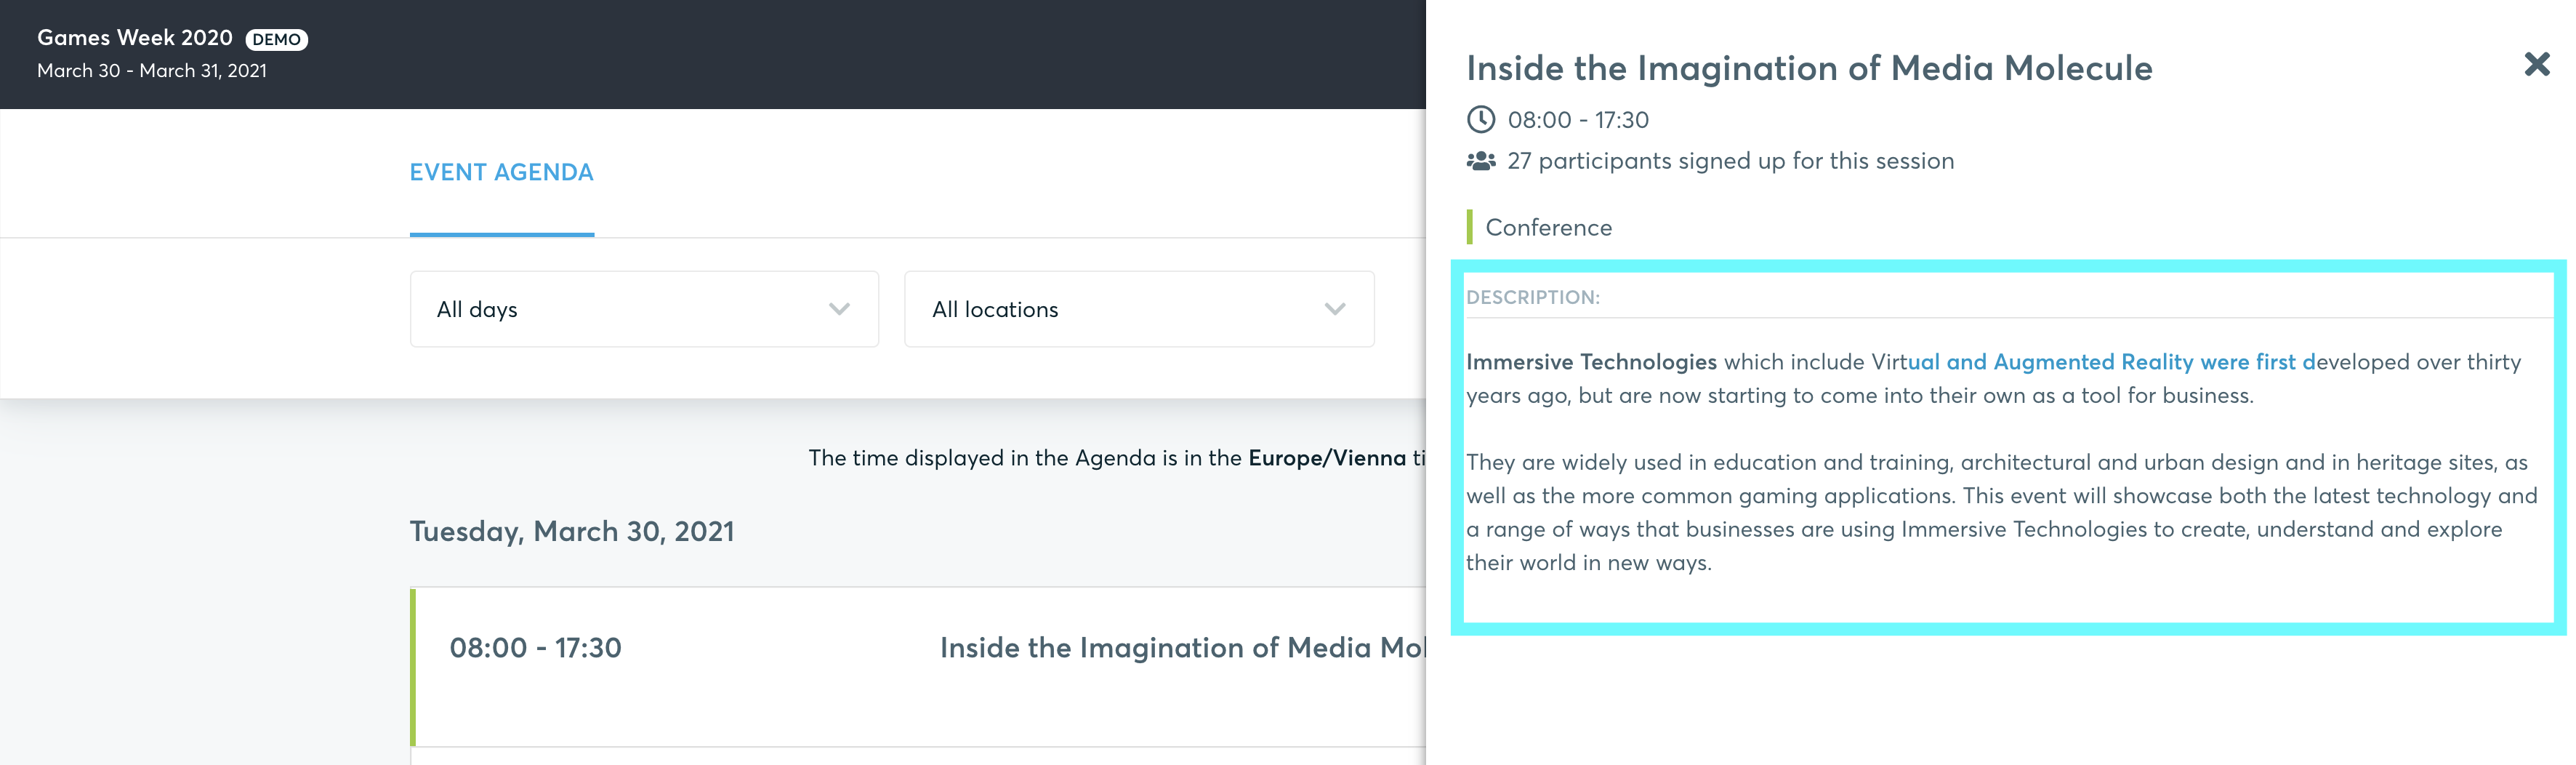
- Public description - add a full description for this session. It can contain details about the topics, speakers, links or videos. The full description will be visible in the event agenda, in the session's panel.
- Private description - add a private description only visible to registered and activated participants who chose this session during registration.
Read more about sessions descriptions
Session Type
Define whether your session is a matchmaking session or a regular session (conference, workshop, pitch, keynote, break).
- Regular Session
- 1:1 Meetings Session
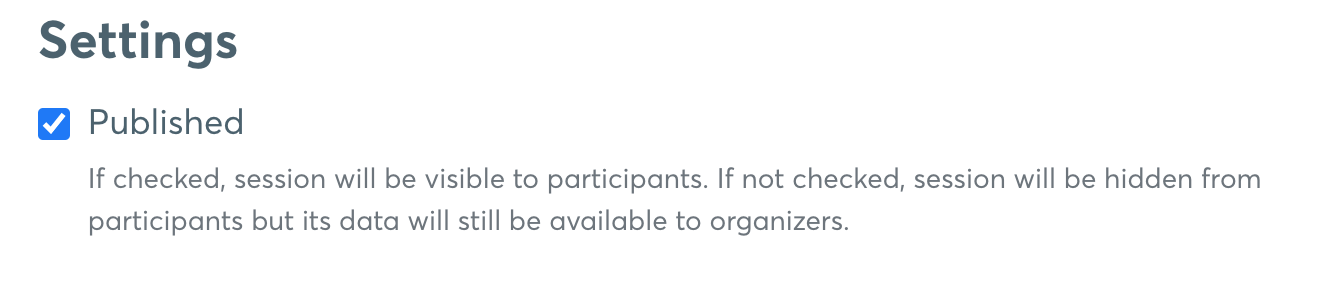
Settings
- Published - this option allows the organizer to decide whether the session is visible to the participants or not. If ticked, the session will be published and visible to the participants. If not ticked, the session will be hidden from the participants, however, its data will still be available to organizers. The organizers can use not published sessions for various purposes, such as testing or hiding sessions that already happened.
- Add to registration - this option allows you to add your session to registration, which means it will be selectable by the participants. If unticked, the session will be automatically added to the participants' agenda and will not appear in the registration. Examples of such sessions are the lunch sessions or the coffee breaks, in which the participants don't have to indicate their attendance.
- Participant limit - indicate the participant limit for this session.

- Show in event agenda - tick this box if you want this session to be shown in the event agenda.
- Show in PDF agenda - tick this box if you want this session to be shown in the participants' individual agendas.
- Prevent overlapping - tick if you want to prevent overlapping. Participants will not be able to select sessions that overlap with this one.
- Online/Virtual Session - tick this box if the session will be an online session that will take place via our integrated video conferencing or another tool (Google Meet, Zoom, Teams, etc).
Matchmaking Sessions
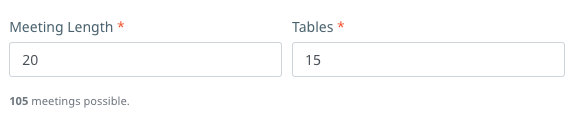
When you choose 1:1 Meetings Session, the session will become a matchmaking one and you have to fill in additional information: the meeting length and the table number. Matchmaking sessions are displayed in registration by default.
- Meeting length - fill in the length of one meeting in minutes. Keep in mind your start and end times. The recommended meeting length and the most common one is 20 minutes.
- Tables - fill in the number of the tables. Keep in mind the number of available physical tables. For virtual events, this section is not displayed.
The typical b2b program is having two matchmaking sessions, one in the morning and one in the afternoon, with a lunch break in between.